Post-run stretches aren’t always the first thing that comes to mind after a tough run, but stretching after running really can make a difference the next day and in the long term.
The first thing to do after running is to get some nutrition and hydration straight in, but after a light quick refuel, doing a few post-run stretches will help you to realign muscle fibres, speed up the recovery process and increase your mobility.
Dynamic stretching before running will give you more long-term flexibility, but post-run stretches are important, too, and may aid recovery.
If you see a physio and get a massage, great, but don’t go there expecting miracles – you’ve got to stretch every day and there’s no time like the present to get started.
Try these four post-run stretches to help your muscles bounce back from your run.
Post-run stretch 1: Sitting glute stretch
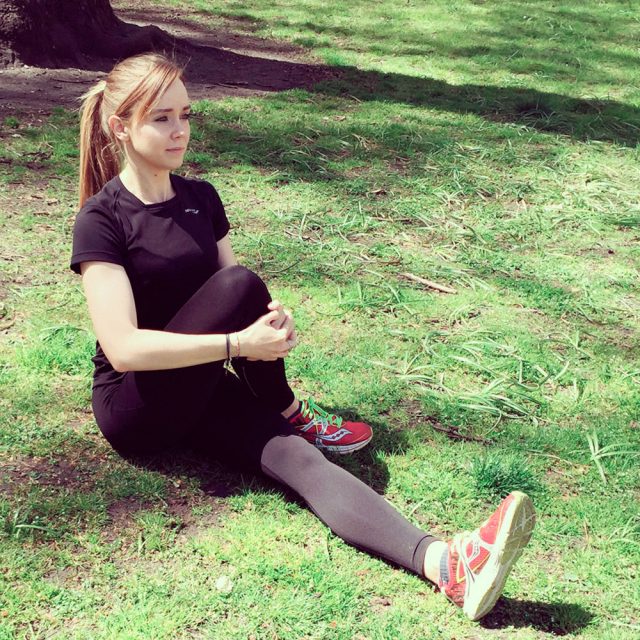
How to do this stretch?
Sit with your back straight, shoulders back, and your legs out straight in front of you. When balanced, take one leg across the body and hug the knee towards your chest. Keep your back straight and always pull your knee towards the opposite side of your body.
How long should this stretch take?
Try different durations (for example, 30–90 seconds) and see what feels best for you. Take a deep breath after some time and as you exhale take the stretch slightly further, but remain relaxed and maintain a good posture at all times. You shouldn’t feel uncomfortable at any point of the stretch.
What is this stretch good for?
This post-run stretch is great for realigning the glute muscles, lower back, and lateral area of the quad and increasing flexibility. It helps to reduce post-exercise soreness (DOMS) and also helps increase recovery, enabling nutrients to begin the repair process at a muscular leve
Post-run stretch 2: Hamstring stretch
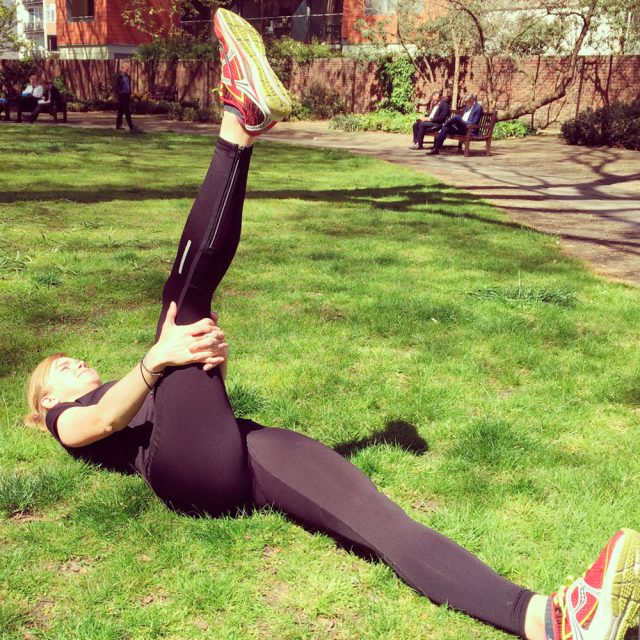
How to do this stretch?
Lay on the ground keeping the hips and upper back in contact with the surface. Keep one leg on the ground and straight out in front of you. Raise the other leg and take hold of the calf/back of knee until you feel a mild stretch in the belly of the hamstring muscle. Be careful not to bounce or force this stretch. Hold the stretch, then take a deep breath and as you exhale take the stretch on slightly further.
You can repeat this process of relax, breath and stretch further several times. Try to complete 1–3 sets on each leg as the hamstring require time and plenty of TLC.
How long should this stretch take?
Aim to work for 15–20 seconds then change legs.
What is this stretch good for?
Improved flexibility in the hamstring group, increased recovery via blood flow and nutrients and improved injury prevention by breaking down knots and adhesions within the muscle.
Post-run stretch 3: Soleus calf stretch
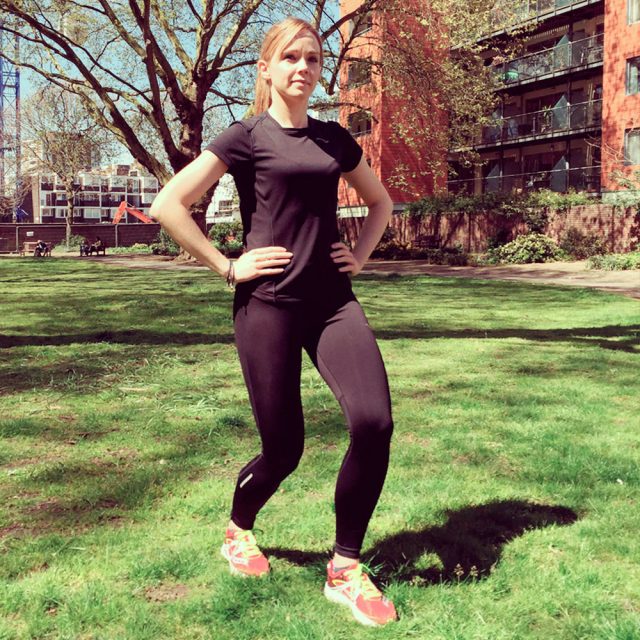
How to do this stretch?
Stand both feet shoulder width apart and put one foot forward. Keep the heel of the rear leg planted on the ground, and keep both feet parallel. Bend the front knee while keeping toe, knee, and hip alignment, then bend the back knee as well and load your weight onto your back leg. You should feel the stretch in the lower calf and Achilles area.
How long should this stretch take?
Again, hold the stretch only as long as you feel comfortable. Try different durations (for example, 30–90 seconds) and see what feels best for you. Take a deep breath after some time and as you exhale take the stretch slightly further, but remain relaxed and maintain a good posture.
What is this stretch good for?
This is a great post-run stretch for improving calf flexibility, conditioning, and recovery. Athletes who practice this stretch and are flexible in this area are less likely to suffer Achilles, plantar fasciitis, and shin-related issues.
Post-run stretch 4: Hip flexor stretch
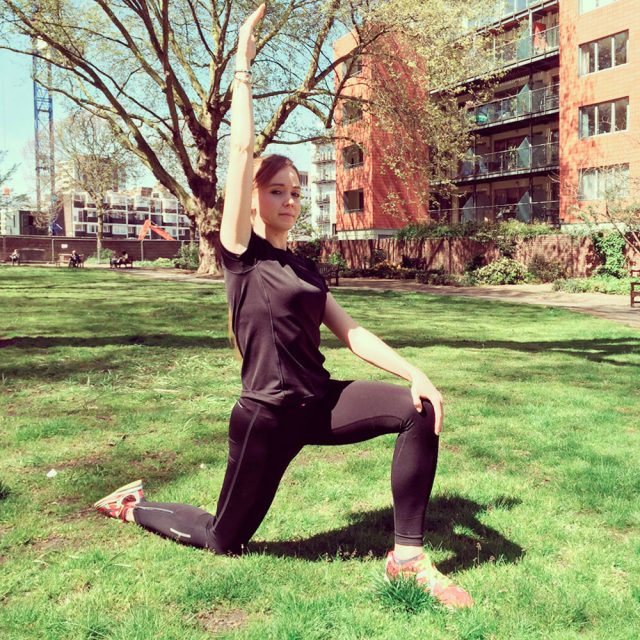
How to do this stretch?
Kneeling on one knee put one foot forward but keep your front knee at a right angle. Work your glute muscle on the side on which your knee is touching the ground to help lock your pelvis into position.
Once in position, reach for the sky with one hand feeling the stretch move up the hip flexor and into the lower tummy area (iliopsoas). If balanced, raise the opposite hand linking both and leaning slightly to the opposite side.
How long should this stretch take?
Try different durations (for example, 30–90 seconds) and see what feels best for you. Take a deep breath after some time and as you exhale take the stretch slightly further, but remain relaxed and maintain a good posture.
What is this stretch good for?
This post-run stretch is great for the long term flexibility and mobilization of the pelvic and hip joint. It enables better every day posture while standing, walking, and running.
If you liked this post, don’t forget to share so that others can find it, too.
Or give it a thumbs up!
I like this article
Please note that the information provided in the Polar Blog articles cannot replace individual advice from health professionals. Please consult your physician before starting a new fitness program.
